User Manual
Follow this guide to set up your Scolia Social system quickly.
Assembling Your Unit
Before installing the Social Box, make sure that your Scolia system is already installed and working. You can find the Scolia setup manuals in your package or online here. Once your Scolia system is operational, you can proceed with the Social Box setup.
The Social Box does not need to be physically connected to the Scolia board unit. The Social Box communicates with the existing Scolia board over the internet, as long as both devices are online.
Setting up your Social Box:
- Plug the power supply into the Social Box.
- Connect the Social Box to the internet using an Ethernet cable.
- Plug the Social Box into your TV using the included HDMI cable.
- Turn on the Social Box and your TV – it will initialize automatically and launch the Scolia Social display.
- Grab a tablet and scan the QR code shown on your TV. The session will start automatically and you’re ready to play!
Social Box Registration
To start playing with Scolia Social, you need to register the Social Box and attach it to a board at game.scoliadarts.com. At the moment, this is done manually when you order the Social Box, so please contact your account representative to make sure it has been completed.
Activating Your Social Subscription
Once the Social Box is attached to your board, navigate to the Board Details page in My Boards menu. If the device is recognized correctly, you will see the Social ready badge displayed on your board’s profile.
To get started:
- Click on the Subscribe button to open the subscription panel.
- Fill out the form and complete the checkout process.
- Once your subscription is confirmed, your board is immediately ready to use Social Games.
Note: If the Social Ready badge does not appear on your Board’s profile, please contact your account representative to ensure the Social Box has been correctly added to your Board.
Setup on your tablet
- On your tablet scan the QR code or go to social.scoliadarts.com and enter the code displayed on your TV.
- For a smoother experience, we recommend saving the web application as a PWA (Progressive Web App) to your tablet’s home screen.
- You can pair the tablet device with the Display Device so users don’t have to reconnect them each time the system starts. We refer to this as Fixed Device Mode.
Fixed Device Mode
You can pair the configuration device with the Display Device so users don’t have to reconnect them each time the system starts. We refer to this as Fixed Device Mode. Once Fixed Device Mode is set up, simply power on the Social Box and the configuration device will automatically connect to it, no code re-entry required.
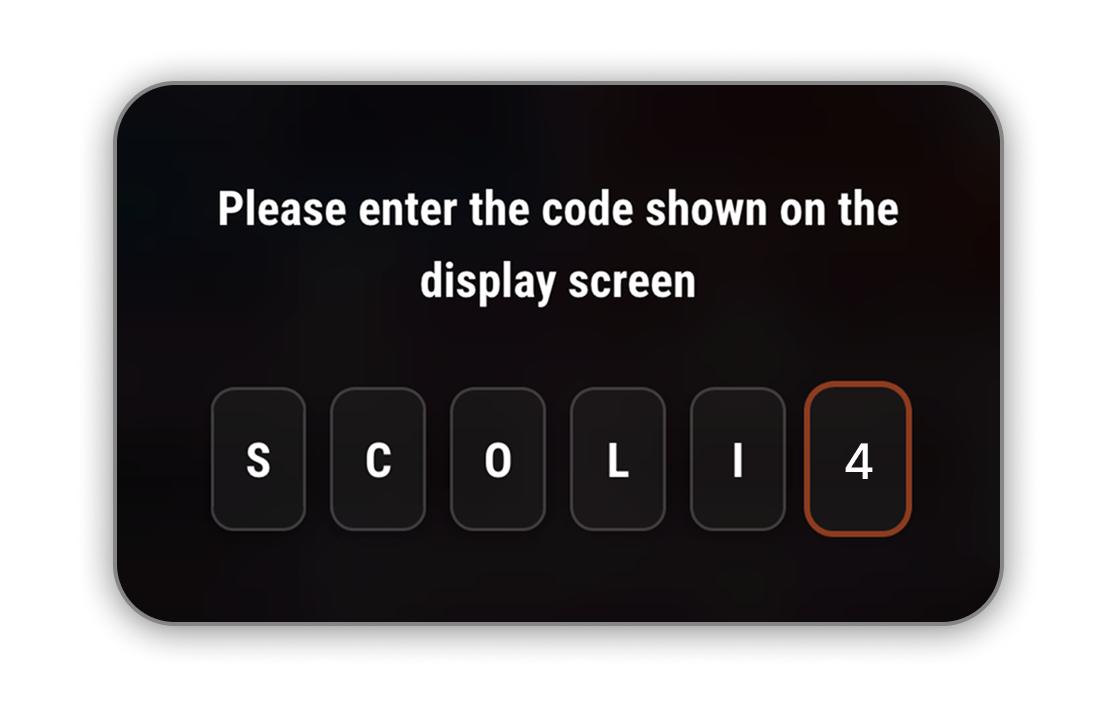
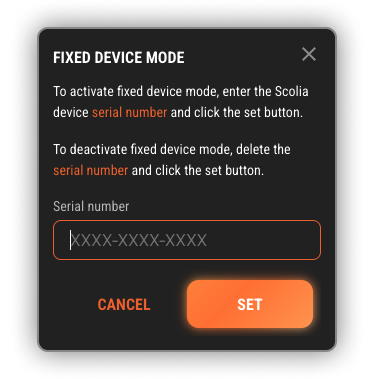
When you are on the intro screen, instead of entering the Display Device code, use the following code: SC0LI4. Please note that 0 is the number zero and 4 is the number four. After that, enter your Scolia system serial number in the input field and click Set.
This will successfully enable Fixed Device Mode. If you want to remove the serial number and disable Fixed Device Mode, first turn off and on the Social Box. Then, enter SC0LI4 again and delete the serial number. This will return the system to the default mode.
Kiosk Mode
Kiosk Mode is ideal for venues and bars to prevent accidental misconfiguration of the tablet. You can set it up so that the tablet only runs the Scolia Social Configurator, ensuring players cannot access anything else.
It’s important to note that while Android’s Screen Pinning is a useful tool for single-app use, it does have some limitations compared to iOS’s Guided Access. For instance, it doesn’t allow the setting of a unique password for the pinned screen; anyone with the main device password can unpin the app. Additionally, it doesn’t prevent users from adjusting volume controls, turning off the display, or accessing certain areas of the screen.
iOS Guided Access
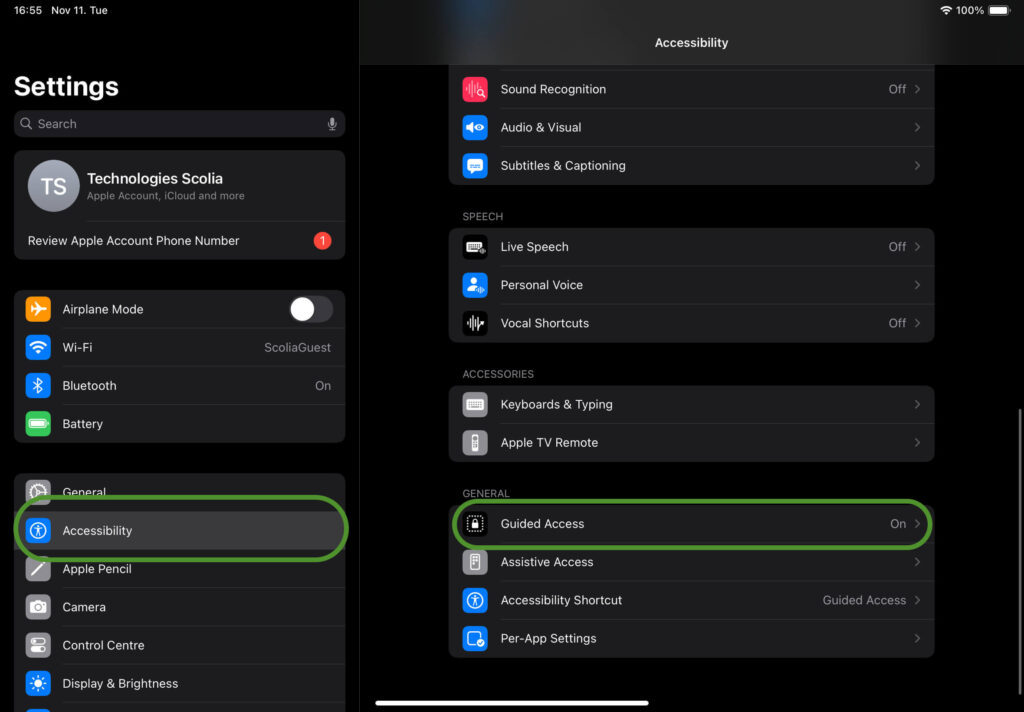
- Go to Settings > Accessibility, then turn on Guided Access.
- Tap Passcode Settings, then tap Set Guided Access Passcode.
- Enter a passcode, then re-enter it. From here, you can also turn on Face ID or Touch ID as a way to end a Guided Access session.
Start a Guided Access session
- Open the app that you want.
- On an iPhone X or later, triple-click the side button. On an iPhone 8 or earler, triple-click the Home button.
- If you want parts of your screen to stop responding to touch, use one finger to circle those areas. You can move or resize the circle, or tap the X to remove it.
- Tap Guided Access, then tap Start.
End a Guided Access session
- Triple-click the Side or Home button, enter your Guided Access passcode, then tap End. Or if you turned on Touch ID or Face ID for Guided Access, double-click the Side or Home button.
Reference: https://support.apple.com/en-us/111795